How Hand-Tufted Rugs Are Made: A Complete Step-by-Step Guide
Have you ever looked closely at a beautifully textured rug and wondered how thousands of wool tufts come together to form one detailed design? A finished rug may look simple when placed in a living room, but making it involves thoughtful planning, suitable materials, skilled artisans and several careful production stages.
Bhadohi, a city in Uttar Pradesh, India, is widely known for its long carpet-making tradition. Artisans in the region use knowledge developed over generations alongside practical tools such as hand-operated tufting guns. This combination allows them to create rugs in many colours, patterns, shapes and textures.
A hand-tufted rug is not produced entirely by an automated machine. The tufting tool is guided by an artisan, who follows the design and checks the rug throughout production.
In this guide, we follow the complete journey of a hand-tufted rug—from its first design drawing and yarn selection to tufting, backing, carving and final quality inspection.
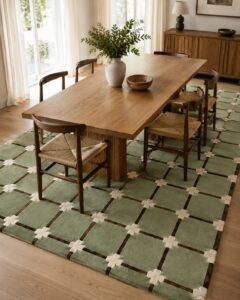
What Is a Hand-Tufted Rug?
A hand-tufted rug is made by pushing yarn through a primary backing cloth that has been stretched tightly over a frame. The artisan uses a tufting tool to follow a pattern drawn on the backing and fills each section with the selected yarn colour.
After tufting, adhesive is applied to the reverse side to hold the yarn in place. A secondary backing is then attached to protect the back of the rug and provide additional support.
Hand tufting is faster than traditional hand-knotting because the artisan does not tie every knot separately. However, the process still requires experience, accuracy and control. The artisan must maintain clean pattern lines, balanced yarn density, accurate colour placement and a consistent pile height.
The final result also depends on the quality of the yarn, latex, backing materials and finishing work. Each element influences how the rug looks, feels and performs over time.
Step 1: Creating the Rug Design
Every hand-tufted rug begins with a design. The pattern may be drawn by hand or prepared using computer design software. At this stage, the designer decides the rug’s dimensions, shape, colour palette, pattern proportions and desired surface texture.
A design that looks attractive on a screen or sheet of paper must also be practical to reproduce with yarn. Very thin lines, tiny shapes and frequent colour changes may not remain clear after tufting, particularly on smaller rugs.
For this reason, the design may be adjusted according to the rug’s dimensions, yarn thickness and required pile height. The scale of the pattern can also be changed to ensure that its most important details remain visible.
For a custom order, the buyer’s room measurements, preferred colours and interior style can be considered before the final design is approved.
Step 2: Preparing the Primary Backing
Once the design is approved, a strong primary backing cloth is stretched over a vertical frame. The cloth must be tight and evenly tensioned.
If the backing is loose, it may move while the artisan is working and cause the design to become distorted. Uneven tension can also affect the rug’s final shape and measurements.
The approved pattern is enlarged according to the required rug size and transferred onto the stretched backing. Because artisans usually tuft from the reverse side, the design may need to be traced in a mirrored direction.
Each colour area and important pattern boundary is marked clearly. These outlines guide the artisan and help ensure that the correct yarn is placed in each section.
Step 3: Selecting and Preparing the Yarn
The yarn is selected according to the rug’s intended use, texture, design, quality requirements and budget. Wool is a popular choice because of its natural softness, resilience and rich appearance.
Premium New Zealand wool is often chosen for luxurious rugs. Indian wool and blended fibres may also be used depending on the required finish, performance and price range.
The selected shades are compared with the approved design or colour chart before tufting begins. Even a small difference in colour can affect the balance of the pattern, so the yarn should be checked under suitable natural light or neutral indoor lighting.
Once the colours have been confirmed, the yarn cones or bundles are arranged in their working order. This simple step keeps the process organised and reduces the possibility of using an incorrect shade.
Step 4: Tufting the Rug by Hand
This is the stage where the rug begins to take shape. The artisan feeds yarn through a hand-operated tufting gun and pushes it into the stretched backing while following the traced pattern.
Depending on the required finish and the type of tool being used, the tufting gun can create either a cut-pile or loop-pile surface.
Good tufting involves more than simply filling the outlined areas. The artisan must control the tool’s speed, direction, pressure and spacing. Curves, narrow lines and small details usually require slower and more precise movements.
Large, plain sections can be filled more steadily, but their yarn density must remain consistent. Uneven tufting may create thin spots, heavy areas or an irregular surface.
The rug is checked regularly from the front during production. This allows the artisan to see whether the colours, outlines and yarn distribution are developing as intended. Gaps or incorrect sections can then be corrected before the rug moves to the backing stage.
Looking for a Handmade Rug?
If you enjoy the texture and character of hand-tufted rugs, you can explore the Bhadohi Eco India collection on Etsy https://bhadohiecoindia.etsy.com. Our shop features handmade and made-to-order designs available with different size and colour options.
Step 5: Inspecting the Completed Tufting
After all the colour sections have been filled, the rug remains on the frame for its first detailed inspection.
The artisan looks for gaps, loose yarn, uneven density and pattern lines that need improvement. Additional yarn can be inserted wherever required.
This inspection is important because many problems are easier to correct while the backing is still stretched firmly on the frame. The tufted rug is also compared with the approved design to confirm that the main colours, proportions and details have been followed correctly.
Step 6: Applying Latex and Secondary Backing
The yarn inserted into the primary backing needs support from the reverse side. A suitable latex adhesive is therefore spread across the back of the tufted rug.
The adhesive helps lock the yarn tufts in place and gives the rug greater stability. It must be applied evenly and allowed to dry properly.
Too little adhesive may not secure the yarn effectively. Uneven or excessive application may affect the rug’s flexibility and overall finish.
After the adhesive stage, a secondary backing—often made from cotton canvas—is attached to cover and protect the reverse side. The sides and corners are then prepared for edge binding and finishing.
The backing materials and application methods can vary depending on the rug design, producer and required quality specification.
Step 7: Shearing the Rug Surface
Once the backing has set properly, the rug is removed from the frame and placed face-up for finishing.
At this stage, the surface may appear slightly uneven because individual yarn tufts may not all be at exactly the same height.
A skilled finisher uses specialised shearing equipment to trim the surface and create a more consistent pile. Careful shearing gives the rug a smoother and cleaner appearance. It also makes the colours, lines and design shapes easier to see.
This work must be performed carefully. Removing too much yarn can reduce the intended pile height or affect the rug’s texture.
Step 8: Hand Carving and Pattern Detailing
Carving is one of the most interesting stages because it adds greater clarity and depth to the design.
Using specialised clippers or scissors, the artisan trims along the boundaries between different colours and pattern sections. This separates adjoining shapes, sharpens the design and gives the lines a cleaner appearance.
Carving can also create a three-dimensional effect. In a high-low rug, selected areas are intentionally finished at different pile heights. These differences create natural shadows and give the pattern a more sculpted look.
Detailed carving requires patience and control. One incorrect cut can disturb a curve, weaken a design line or remove more yarn than intended.
Step 9: Edge Finishing, Cleaning and Drying
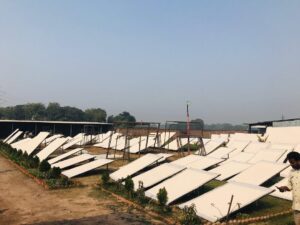
The rug’s sides and corners are checked and finished neatly so that it maintains its intended shape. Loose surface fibres and production dust are removed, and the rug is cleaned according to its materials and production requirements.
If washing is part of the process, moisture must be managed carefully. The rug then needs to dry thoroughly before it moves to the final inspection.
The rug may also be stretched or blocked to correct small variations in its shape and bring its measurements closer to the approved dimensions.
Because hand-tufted rugs pass through several manual stages, slight variations can sometimes occur. These differences are a natural part of the rug’s handmade character rather than signs of mass production.
Step 10: Final Quality Inspection
Before packing, the completed rug goes through a final quality inspection.
Its dimensions, colours, pile consistency, carved lines, corners, edges and backing are checked carefully. The surface is also examined for loose yarn, missing sections and uneven areas.
The rug’s shape and measurements are compared with the original order specifications. Any remaining loose fibres are removed, and necessary finishing corrections are completed before packing.
Secure packaging is particularly important when the rug is being shipped internationally. It helps protect the surface from moisture, dirt and damage while the rug is in transit.
How Long Does It Take to Make a Hand-Tufted Rug?
The production time depends on the rug’s size, pattern complexity, number of colours, material availability and amount of carving required.
A small rug with a simple geometric pattern can normally be completed faster than a large custom rug with fine details, several colours and different pile heights.
The backing, drying and finishing stages should not be rushed simply to shorten the production schedule. Each stage needs enough time to achieve a properly finished result.
Buyers purchasing a made-to-order rug should confirm the expected production time before placing an order.
At Bhadohi Eco India, production requirements and estimated timelines are discussed according to the selected design, dimensions and customisation needs. Rugs are produced with the support of skilled production partners in Bhadohi.
Why Is the Finishing Process Important?
Tufting creates the basic structure of the rug, but careful finishing turns that structure into a polished product.
Shearing makes the surface smoother and more even. Carving improves the clarity of the pattern, while neatly finished edges give the rug a cleaner appearance.
Backing, drying and shape correction also affect the rug’s stability, durability and final presentation.
To learn more about these stages, read our related article: How Hand-Tufted Rugs Are Finished: Step-by-Step Guide https://bhadohiweaves.com/how-hand-tufted-rugs-are-finished-step-by-step-guide-with-real-bhadohi-workshop-video/crafting-heritage-bhadohi-artisans-at-work .
Final Thoughts
A hand-tufted rug passes through several skilled stages before it reaches a home. Designing, tracing, choosing the yarn, tufting, applying latex, attaching the backing, shearing, carving and inspecting the rug all contribute to the final result.
It is this combination of creativity, practical knowledge and careful craftsmanship that gives each handmade rug its own texture and character.
Bhadohi Eco India connects buyers with Bhadohi’s carpet-making tradition through handmade and made-to-order rugs produced with experienced local partners. Colours and dimensions can be customised according to the selected design and the buyer’s requirements.
Would you like to bring the character of a handmade Bhadohi rug into your home? Visit Bhadohi Eco India on Etsy https://bhadohiecoindia.etsy.com to explore our latest designs, available sizes and custom-order options.
If you need a particular colour, size or design, contact us directly through Etsy before ordering. We will be happy to discuss the available customisation options with you.
.